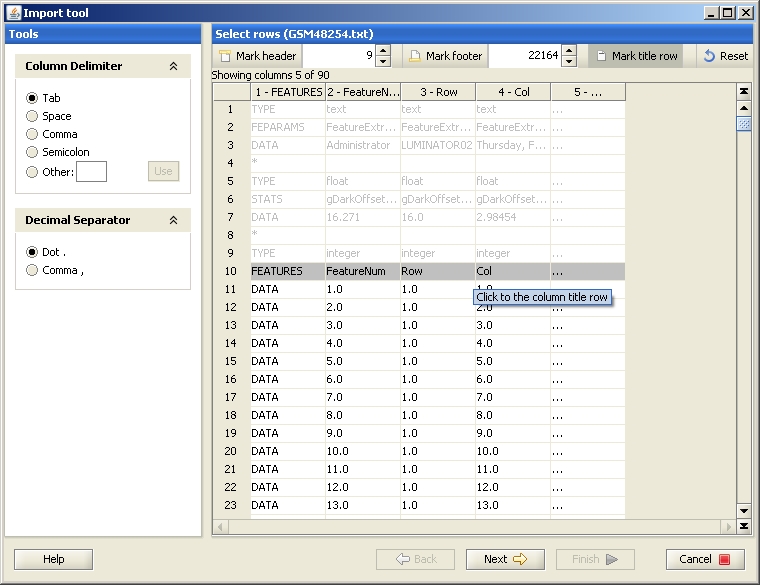
At this step you are asked to define which rows of the datafile you would like Chipster to use. Rows are marked using the buttons Mark title row, Mark header and Mark footer, which are located at the top of the Select rows -panel. To select a title row, click on the Mark title row -button and then on the row you would like to select. If your datafile contains rows before the title row and the actual data, mark them as a header: Click on the button Mark header and then on the last row of the header. Simlarly, if your datafile contains a footer, click on the button Mark footer and then on the first row of the footer (the row just after the data).
Chipster can automatically recognize the column delimiter used in the data file, and split table into columns correctly. However, the automatic recognition might fail if your datafile is very short. In this case please select the correct delimiter from the Tools panel on the left. Similarly, you can change the decimal separator if needed. Note that the decimal separator can't be the same character as the column delimiter.
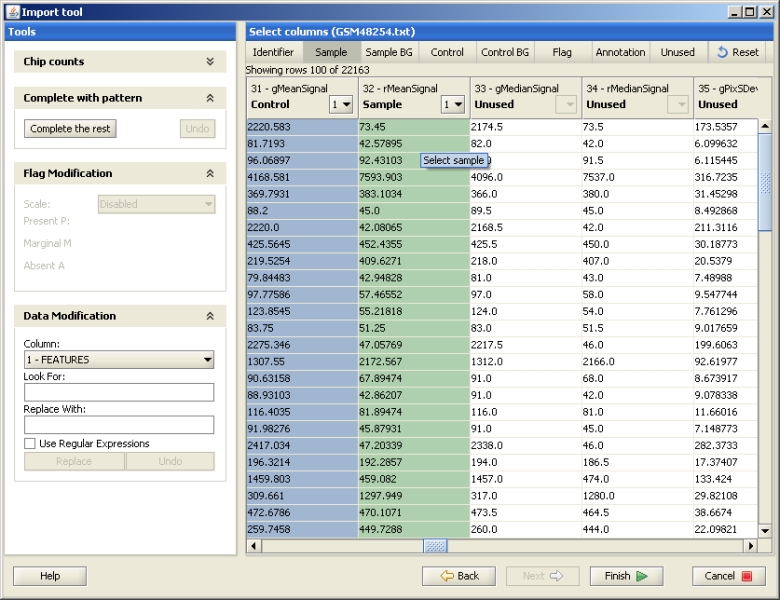
At this step you are asked to define which columns of the datafile you would like Chipster to use. Columns are marked using the buttons Identifier, Sample, Sample BG, Control, Control BG, Flag and Annotation, which are located at the top of the Select columns -panel. Simply click on the Identifier button, and then click on the column which contains the identifiers (such as TargetID of ProbeID for Illumina, or ProbeName for Agilent). The other columns are marked the same way. Note that the columns Control and Control BG are used only for two color data. If you are not sure which are the required columns of your data, please consult the data file specific instructions below. If you accidentally mark a wrong column, you can remove the marking by using the Unused button. The Reset button removes all your markings. In case you need to replace some letters etc in your data columns, use the Data modification panel.
If you have dye-swap arrays in your experiment, you should import your data in two phases. First import the un-swapped data file labeling the columns normally. Next, import the dye-swapped arrays by switching the sample and control columns.
Illumina, BeadStudio version 1 and 2 files